
Appearance
Device configuration
Use the desktop LoRaWAN Configuration Tool to create a configuration profile, connect to the device, and write the profile to the sensor.
Open the desktop configurator
Run the desktop configurator on your computer. The main screen shows the saved profiles, the COM port selector, and the device connection status.
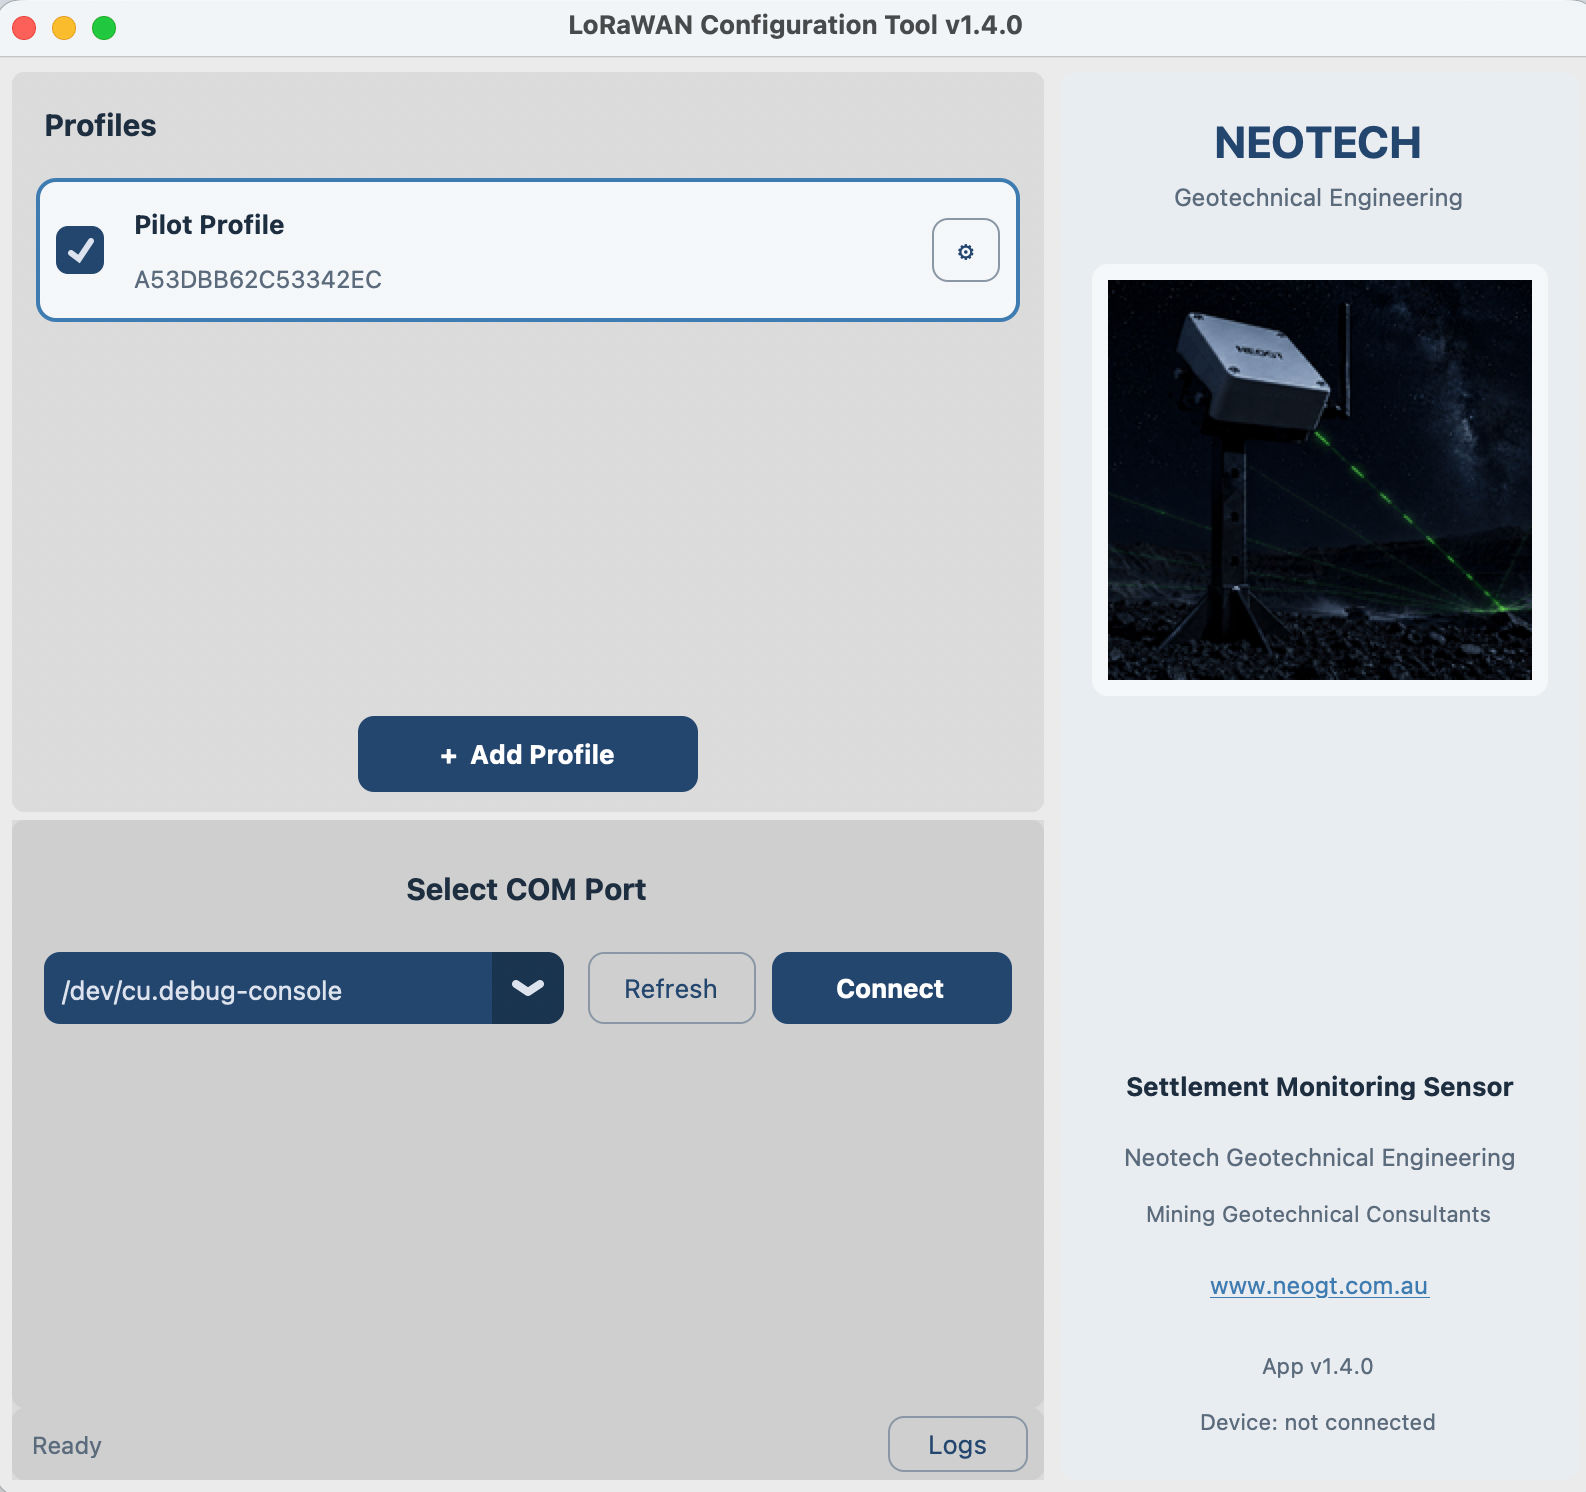
Create a profile
Click Add Profile to create a new LoRaWAN profile for the site.
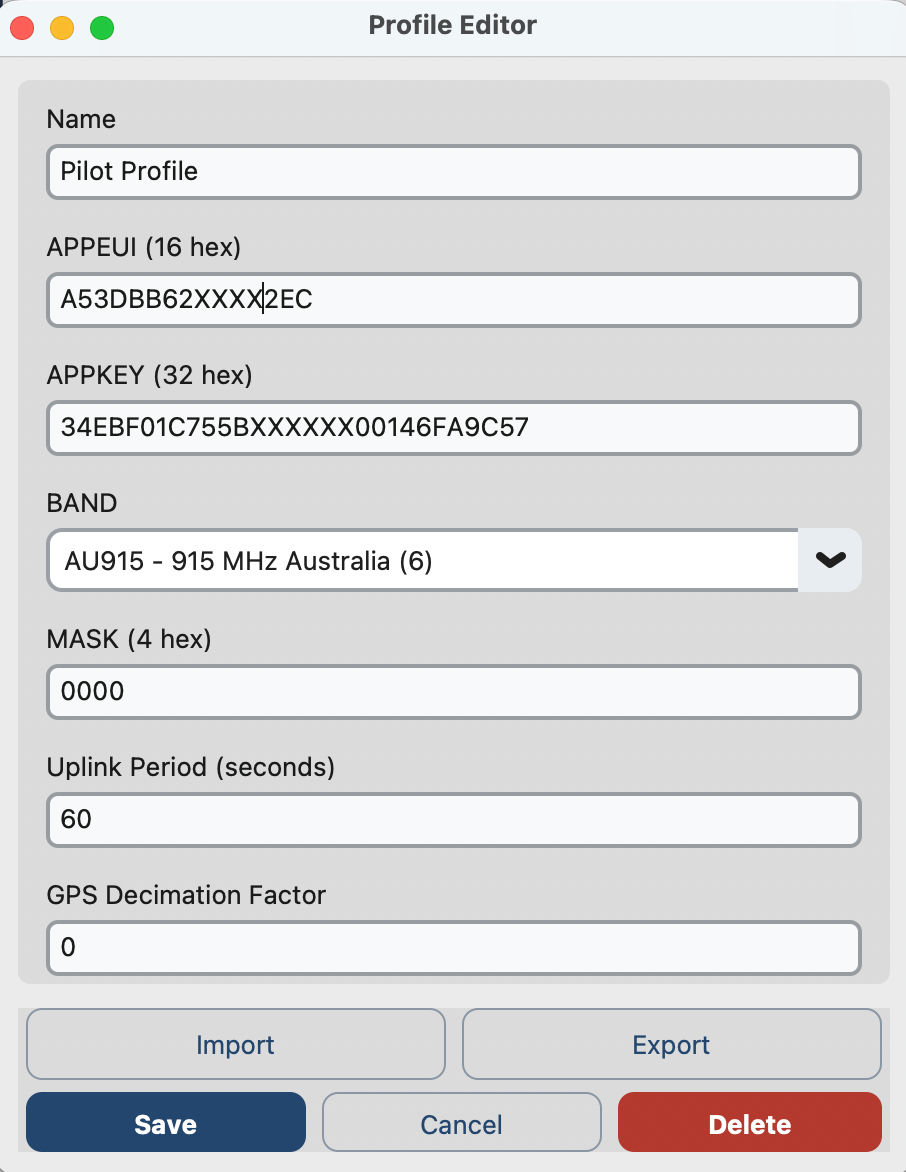
In the profile editor:
- Enter a clear profile name.
- Select the country or LoRaWAN band for the deployment.
- Enter the APPEUI generated in WisGate.
- Enter the APPKEY generated in WisGate.
- Leave MASK as
0003. - Set the Uplink Period.
- Set the GPS Decimation Factor if the device has GPS.
- Click Save.
Uplink Period
Uplink Period controls how often the sensor sends data, in seconds.
Use this value carefully because it affects battery life:
- For devices with external power, you can use a shorter uplink period when more frequent readings are required.
- For battery-powered devices, choose an uplink period that matches the required monitoring frequency and expected battery life.
- For long-term monitoring, avoid unnecessarily low values unless the site risk or monitoring plan requires high-frequency readings.
Example:
txt
1800 seconds = one reading every 30 minutesGPS Decimation Factor
GPS Decimation Factor is used for devices that include GPS.
It controls how often GPS data is included relative to normal sensor uplinks. For example, if the factor is 8, the device can send normal sensor readings regularly and include GPS data every eighth uplink.
This helps reduce power use because GPS readings can consume more energy than standard sensor readings.
Put the device into configuration mode
Open the screws on the top of the device enclosure and press the Reset button.
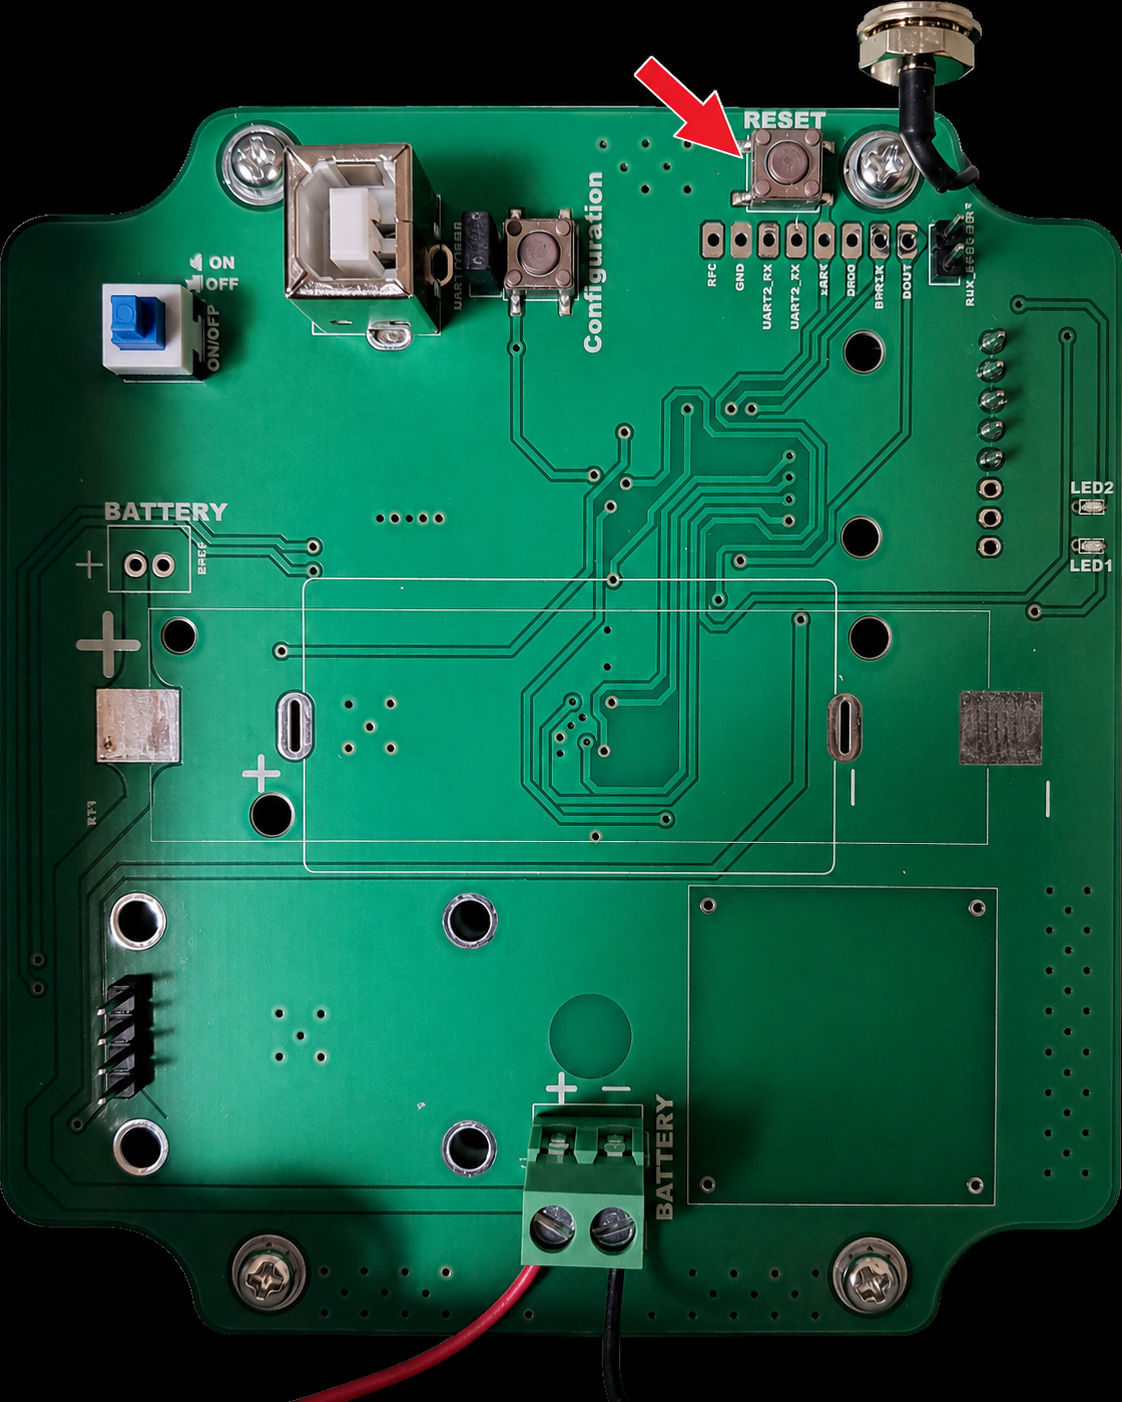
After reset, the device LEDs blink and the device enters configuration mode for about 60 seconds.
Configuration window
Connect and configure the device while the LEDs are blinking. If the configuration window expires, press Reset again to re-enter configuration mode.
Connect the device to the computer
Connect the device to the computer using a USB printer-style cable, typically USB-A to USB-B.
In the desktop configurator:
- Open the COM port selector.
- Select the port assigned to the device.
- Click Connect.
On macOS, the port may look like:
txt
/dev/cu.usbserial-XXXX
/dev/cu.debug-console
On Windows, the port may look like:
txt
COM3
COM4
If the port does not appear, disconnect and reconnect the USB cable, then click Refresh.
Configure the device
After the device is connected:
- Select the profile created for the site.
- Click Configure.
- Wait for the configurator to finish writing the profile.
- Confirm the tool reports that configuration completed successfully.
The device is now ready to join the WisGate application using the APPEUI and APPKEY from the saved profile.